
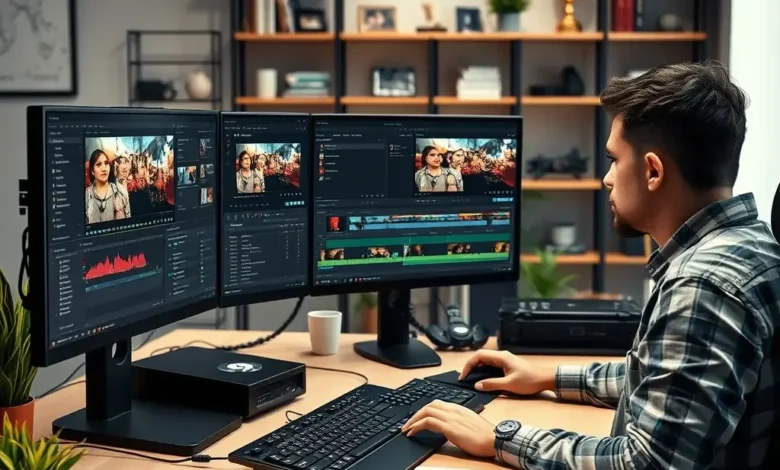
Video editing has evolved from a niche skill reserved for professionals to a mainstream activity accessible to anyone with a smartphone or computer. Whether you’re crafting content for social media, documenting events, or producing cinematic masterpieces, mastering video editing apps can transform raw footage into polished, engaging videos. The right tools and techniques can elevate your work from amateur to professional-grade, making your content stand out in a crowded digital landscape.
This guide dives deep into the world of video editing apps, offering actionable advice on advanced editing techniques, seamless transitions, and eye-catching effects. Whether you’re using industry-standard software like Adobe Premiere Pro or a user-friendly mobile app like CapCut, the principles of professional editing remain consistent. By understanding the core concepts and leveraging the right features, you can create videos that captivate audiences and leave a lasting impression.
- ✅ Understand the fundamentals of video editing workflows.
- 🎯 Master advanced techniques like color grading and motion tracking.
- ⚠️ Avoid common pitfalls that can ruin your project.
- 💡 Optimize your workflow for efficiency and creativity.
🎬 Why Video Editing Skills Matter
In today’s digital age, video content dominates online platforms. From YouTube tutorials to Instagram reels and TikTok trends, the demand for high-quality video content has never been higher. Learning to edit videos professionally isn’t just about adding filters or trimming clips—it’s about storytelling. Editing allows you to craft narratives, evoke emotions, and deliver messages with precision. A well-edited video can communicate ideas more effectively than text or static images, making it a powerful tool for creators, marketers, and educators alike.
The rise of artificial intelligence and cloud-based tools has democratized video editing, making professional-grade software more accessible than ever. However, accessibility doesn’t equate to expertise. Many users struggle with the steep learning curve of advanced software or the limitations of basic mobile apps. This guide bridges that gap by breaking down complex concepts into simple, actionable steps. Whether you’re a beginner or an intermediate editor looking to refine your skills, you’ll find practical insights to enhance your editing prowess.
🔧 Understanding the Core Features of Video Editing Apps
Video editing apps, whether on desktop or mobile, share a common set of core features that form the backbone of the editing process. These features include timeline manipulation, clip trimming, transitions, effects, and audio editing. Understanding how these tools work is essential for creating cohesive and visually appealing videos. Let’s explore each of these features in detail and how they contribute to the editing process.
The timeline is the heart of any video editing software. It’s where you arrange, trim, and manipulate clips to build your story. Most apps allow you to import media files directly into the timeline, where you can cut, split, and rearrange them. Trimming clips is one of the most basic yet crucial skills in video editing. It involves removing unwanted sections from clips to maintain a tight narrative flow. Advanced apps offer tools like ripple editing, which automatically adjusts the timeline to prevent gaps or overlaps when trimming clips.
📌 Timeline and Clip Management
Effective timeline management is key to a smooth editing process. Here’s how to optimize your workflow:
- ✅ Organize your media: Use folders or bins to categorize clips, images, and audio files. This keeps your project tidy and saves time during editing.
- 🎯 Label your tracks: If your editing app supports multiple layers (video, audio, effects), label each track for easy navigation.
- ⚠️ Avoid clutter: Remove unused clips and assets from your timeline to maintain performance and clarity.
Clip management also involves understanding the difference between cutting and trimming. Cutting removes a section of the clip entirely, while trimming adjusts the start or end point. Mastering these techniques allows for precise control over your footage, ensuring every moment serves the story.
📌 Transitions and Effects
Transitions are the bridges between clips, guiding the viewer from one scene to the next. While basic apps offer simple cuts and fades, advanced editing software provides a vast array of transitions, including wipes, slides, and 3D effects. The key to using transitions effectively is subtlety. Overusing flashy transitions can distract from your content and disrupt the viewer’s experience. Instead, focus on transitions that enhance the narrative flow, such as a smooth dissolve during a flashback or a quick cut for a dramatic moment.
Effects, on the other hand, are used to enhance the visual appeal of your video. This can include color correction, motion blur, or stylized filters. Many modern apps leverage AI to simplify complex effects, such as auto-color grading or background removal. However, manual control over these effects allows for a more personalized touch. For instance, adjusting the color temperature can evoke different moods—warm tones for nostalgia, cool tones for a futuristic feel.
📌 Audio Editing and Mixing
Audio is often an overlooked aspect of video editing, yet it plays a critical role in shaping the viewer’s experience. Poor audio quality can ruin an otherwise stunning video. Most editing apps include tools for adjusting volume, removing background noise, and synchronizing audio with video. Advanced features like audio ducking automatically lower background music when dialogue or narration occurs, ensuring clarity.
Don’t underestimate the power of sound design. Adding background music can set the tone for your video, while subtle sound effects enhance immersion. For example, the rustling of leaves in a nature documentary or the clinking of glasses in a cooking tutorial can make your content feel more lifelike. Always ensure your audio levels are balanced—too loud can be jarring, while too soft makes it hard to hear.


🎨 Advanced Editing Techniques for Polished Videos
Once you’ve mastered the basics, it’s time to explore advanced editing techniques that can take your videos to the next level. These techniques not only improve the visual quality of your content but also enhance storytelling and engagement. From color grading to motion tracking, these tools allow you to add depth, realism, and creativity to your projects.
🔥 Color Grading for Emotional Impact
Color grading is the process of adjusting the colors in your video to achieve a specific look or mood. It’s a powerful tool for conveying emotions and enhancing the visual appeal of your footage. While color correction focuses on fixing issues like white balance or exposure, color grading is about creative expression. For example, a horror movie might use desaturated, dark tones to create a sense of dread, while a romantic comedy could feature warm, vibrant colors to evoke happiness.
Most professional editing apps, such as DaVinci Resolve or Adobe Premiere Pro, include dedicated color grading tools. These tools allow you to adjust hue, saturation, and luminance for individual colors. You can also apply LUTs (Look-Up Tables) to quickly apply pre-set color grades. For beginners, apps like CapCut and LumaFusion offer simplified color grading options that still deliver impressive results.
Start by correcting any color issues in your footage, such as white balance or exposure. Then, experiment with different color grades to see how they affect the mood of your video. Remember, subtlety is key—overly saturated or unnatural colors can distract from your content.
🔥 Motion Tracking for Dynamic Effects
Motion tracking is a technique that allows you to attach elements to moving objects in your footage. This can include text, graphics, or even other videos. For example, you could track a person’s face and overlay a graphic that follows their movements, or add a floating caption that stays in place as the camera moves. Motion tracking is widely used in VFX (visual effects) work, product demos, and educational videos.
Most advanced editing apps, such as After Effects or Final Cut Pro, include robust motion tracking tools. These tools analyze the movement in your footage and generate tracking data that you can use to attach elements. For simpler needs, apps like CapCut and iMovie offer basic motion tracking features that are easy to use.
To use motion tracking effectively, follow these steps:
- Select your footage: Choose the clip you want to track and identify the object or area you want to attach an element to.
- Apply the track: Use your editing app’s motion tracking tool to analyze the movement. Most apps allow you to select a tracking point and let the software do the rest.
- Attach your element: Once the tracking is complete, you can attach text, images, or videos to the tracked point. Adjust the size, position, and timing to ensure it looks natural.
- Refine the effect: Preview your footage and make any necessary adjustments to the tracking data or element placement.
🔥 Keyframing for Animation and Control
Keyframing is a technique used to create animations or control how effects change over time. It involves setting specific points (keyframes) in your timeline where a property, such as position, scale, or opacity, is defined. The software then interpolates the values between these keyframes to create smooth transitions. Keyframing is essential for creating dynamic titles, animated graphics, and even complex visual effects.
For example, you could use keyframing to animate a text layer that swoops in from off-screen or fades out gradually. You could also use it to adjust the opacity of a video clip, creating a smooth transition between scenes. Most editing apps, from Premiere Pro to iMovie, support keyframing, though the level of control varies.
To use keyframing effectively, start by identifying the property you want to animate. Then, set keyframes at the beginning and end of the animation. Adjust the values at each keyframe to create the desired effect. Preview your animation and tweak the keyframes as needed to achieve smooth, natural movement.
🔥 Green Screen and Chroma Key
Green screen, or chroma key, is a technique used to replace a specific color (usually green or blue) in your footage with another image or video. This allows you to place your subject in different environments or add visual effects that would be difficult or impossible to capture in-camera. Green screen is widely used in filmmaking, news broadcasts, and even social media content.
The process of using green screen involves several steps:
- Shoot your footage: Ensure your subject is well-lit and the green screen is evenly lit with no shadows or wrinkles.
- Import into editing software: Most advanced apps, such as Premiere Pro or Final Cut Pro, include chroma key tools. Some mobile apps, like CapCut, also offer basic green screen features.
- Key out the green: Use the chroma key tool to remove the green color from your footage. Adjust the settings to ensure clean edges and minimal spill (when the green color reflects onto your subject).
- Add your background: Import the image or video you want to use as the background and layer it beneath your subject. Adjust the position and scale to fit the scene.
- Refine the effect: Use tools like edge feathering or color correction to blend your subject seamlessly with the background.
🎯 Optimizing Your Workflow for Efficiency
Efficiency is crucial in video editing, especially when working on large projects or tight deadlines. A well-optimized workflow allows you to focus on creativity rather than technical hurdles. From organizing your files to leveraging keyboard shortcuts, small adjustments can save hours of work. Let’s explore how to streamline your editing process and boost productivity.
🚀 Organizing Your Project Files
Before you start editing, take the time to organize your project files. A cluttered workspace leads to wasted time and frustration. Here’s how to keep your project tidy:
- ✅ Create a folder structure: Use a logical hierarchy for your files, such as separate folders for raw footage, audio, graphics, and exports.
- 🎯 Use consistent naming: Name your files descriptively to make them easy to identify. For example, use “Interview_Scene1_Cut1.mp4” instead of “VID_20230515_123456.mp4”.
- ⚠️ Avoid duplicates: Keep only one copy of each file in your project directory to avoid confusion and save storage space.
Many editing apps also allow you to create bins or folders within the software itself. Use these tools to group related clips or assets, making it easier to find what you need during editing. Additionally, consider using cloud storage solutions like Google Drive or Dropbox to back up your project files and access them from anywhere.
🚀 Keyboard Shortcuts and Customization
Keyboard shortcuts are a video editor’s best friend. They allow you to perform actions quickly without navigating through menus, saving valuable time. Most professional editing apps, such as Premiere Pro and Final Cut Pro, offer extensive customization options for shortcuts. Even simpler apps like iMovie and CapCut include basic shortcuts to speed up your workflow.
Here are some essential shortcuts to learn:
- ✅ Play/Pause: Spacebar
- 🎯 Trim clips: Use the
I(in-point) andO(out-point) keys to set markers for trimming. - ⚠️ Undo/Redo:
Ctrl+Z/Ctrl+Y(Windows) orCmd+Z/Cmd+Y(Mac) - 💡 Toggle fullscreen:
Shift+`(Premiere Pro) orCmd+F(Final Cut Pro)
Take the time to customize shortcuts to match your workflow. For example, if you frequently use the razor tool to cut clips, assign it to a key that’s easy to reach. Over time, these shortcuts will become second nature, allowing you to edit faster and more efficiently.
🚀 Proxy Workflow for Smooth Editing
Working with high-resolution footage, such as 4K or 8K, can strain even the most powerful computers. Proxy workflows allow you to edit with lower-resolution versions of your clips, reducing lag and improving performance. Once you’ve completed your edits, you can relink the proxy files to the original high-resolution footage during export.
Most professional editing apps, such as Premiere Pro and Resolve, support proxy workflows. Here’s how to set it up:
- Create proxies: In your editing software, select the option to create proxy files. The software will generate lower-resolution versions of your clips.
- Switch to proxy mode: Enable proxy mode to work with the lower-resolution files. This reduces strain on your computer’s resources.
- Edit as usual: Perform your edits, transitions, and effects as you normally would. The proxy workflow ensures smooth playback and responsiveness.
- Relink to originals: Before exporting, switch back to the original files. The software will automatically relink the proxies to the high-resolution footage for the final output.
🚀 Automating Repetitive Tasks
Repetitive tasks, such as applying the same effect to multiple clips or resizing graphics, can eat up valuable time. Many editing apps offer automation features to streamline these processes. For example, Premiere Pro’s Essential Graphics panel allows you to create and apply templates for titles and graphics. Similarly, apps like CapCut include batch editing tools for applying effects to multiple clips at once.
Another powerful automation tool is scripting. Advanced users can write scripts in languages like Python or JavaScript to automate complex tasks. For example, a script could batch process a folder of clips, adding the same color grade or transition to each one. While scripting requires technical knowledge, it’s a game-changer for editors working on large projects.
🎞️ Choosing the Right Video Editing App for Your Needs
With so many video editing apps available, selecting the right one can be overwhelming. The best app for you depends on your skill level, project requirements, and budget. Let’s break down the top options for different use cases, from mobile editing to professional filmmaking.
📱 Mobile Apps: Editing on the Go
Mobile video editing apps have come a long way, offering powerful tools in a compact, user-friendly package. These apps are perfect for creators who need to edit on the go or create content directly from their smartphones. Here are some of the best mobile editing apps:
- ✅ CapCut: A free, all-in-one editing app with AI-powered tools like auto-captioning and background removal. Ideal for social media content and quick edits.
- 🎯 LumaFusion: A professional-grade app for iOS, offering advanced features like multi-track editing, color grading, and motion tracking. Perfect for filmmakers and serious creators.
- ⚠️ iMovie: Apple’s user-friendly app for macOS and iOS. Great for beginners and simple projects, with a clean interface and essential editing tools.
When choosing a mobile editing app, consider factors like ease of use, available features, and export quality. Many free apps include watermarks or limit export resolution, so check the terms before committing.
💻 Desktop Apps: Professional-Grade Editing
For serious video editing, desktop apps offer the most power and flexibility. These apps are designed for complex projects, advanced effects, and high-resolution footage. Here are the top choices for desktop editing:
- ✅ Adobe Premiere Pro: Industry-standard software with a comprehensive suite of tools for editing, color grading, and audio mixing. Part of Adobe Creative Cloud, it integrates seamlessly with other Adobe apps like After Effects and Photoshop.
- 🎯 Final Cut Pro: Apple’s professional editing software, known for its user-friendly interface and advanced features like magnetic timeline and 360-degree video editing. Only available for macOS.
- ⚠️ DaVinci Resolve: A powerhouse for color grading and visual effects, DaVinci Resolve also includes robust editing tools. Its free version offers most features, while the Studio version unlocks additional capabilities like 3D tools and motion blur.
Desktop apps typically require a more powerful computer, especially for 4K or 8K editing. Consider your hardware specifications and project requirements when choosing a desktop editing app.
🌐 Online Apps: Browser-Based Editing
Online video editing apps are a convenient option for users who don’t want to install software or need to collaborate remotely. These apps run in a web browser and often include cloud storage for easy access. Here are some popular online editing tools:
- ✅ WeVideo: A cloud-based editor with AI-powered tools, collaboration features, and a library of stock assets. Suitable for both beginners and professionals.
- 🎯 Canva: Known for its design tools, Canva also includes a simple video editor with templates for social media, presentations, and ads.
- ⚠️ Clipchamp: A user-friendly online editor with AI features like auto-captioning and background blur. Acquired by Microsoft, it integrates with OneDrive for seamless workflows.
Online apps are limited by internet speed and browser capabilities, so they may not be suitable for complex projects. However, they’re a great option for quick edits, social media content, and collaborative work.
🔐 Privacy and Security in Video Editing
Video editing often involves working with sensitive or personal content, so privacy and security are critical concerns. Whether you’re editing a family video or a client’s project, protecting your data and intellectual property is essential. Let’s explore the key aspects of privacy and security in video editing.
🛡️ Protecting Your Project Files
Your project files contain raw footage, audio, and edits that are the foundation of your video. Losing this data can be devastating, so it’s crucial to back up your files regularly. Here are some best practices for protecting your project files:
- ✅ Use cloud storage: Services like Google Drive, Dropbox, or iCloud offer secure, automatic backups for your files. This ensures you can recover your work if your computer crashes or is lost.
- 🎯 Create local backups: In addition to cloud storage, save copies of your project files to an external hard drive or USB drive. Store backups in a different physical location for added security.
- ⚠️ Encrypt sensitive files: If you’re working with confidential content, use encryption tools like VeraCrypt or 7-Zip to protect your files from unauthorized access.
Many editing apps also include auto-save features that create temporary backups while you work. Enable these features to minimize the risk of losing unsaved progress.
🛡️ Licensing and Copyright Considerations
Video editing often involves using third-party assets, such as music, images, and sound effects. Using copyrighted material without permission can lead to legal issues, including takedowns or fines. To avoid these problems, use royalty-free or licensed assets from reputable sources. Here are some tips for staying compliant:
- ✅ Use royalty-free libraries: Platforms like Epidemic Sound, Artlist, and Envato Elements offer high-quality, royalty-free music and sound effects. Many online video editors also include built-in libraries with licensed assets.
- 🎯 Check licensing terms: Always review the licensing terms for any asset you use. Some assets may require attribution or have restrictions on commercial use.
- ⚠️ Avoid copyrighted content: Unless you have explicit permission, avoid using copyrighted music, movie clips, or brand logos in your videos. Even short clips can lead to copyright strikes on platforms like YouTube.
🛡️ Secure Collaboration and Sharing
Collaborating on video projects often involves sharing files with team members or clients. Sharing sensitive or unfinished work can pose security risks, so it’s important to use secure methods. Here are some best practices for secure collaboration:
- ✅ Use encrypted file-sharing services: Platforms like Dropbox, Google Drive, and WeTransfer offer secure file-sharing options with encryption and password protection.
- 🎯 Set access permissions: Limit who can view, edit, or download your files. Most cloud storage services allow you to set specific permissions for each collaborator.
- ⚠️ Avoid public links: Never share project files via public links or unsecured methods like email attachments. These can be accessed by anyone and pose a security risk.
When sharing files for review or feedback, consider using specialized tools like Frame.io or Wipster. These platforms allow secure, time-coded annotations and revisions without exposing your entire project.
🆚 Alternatives to Popular Video Editing Apps
While Adobe Premiere Pro, Final Cut Pro, and CapCut are among the most popular video editing apps, they aren’t the only options available. Depending on your needs, budget, or workflow preferences, you might find a better fit in alternative software. Let’s explore some lesser-known but powerful alternatives to these industry giants.
🔹 Shotcut
Best for: Users looking for a free, open-source editor with advanced features.
Key Features:
- ✅ Open-source and free: Shotcut is completely free to use, with no hidden costs or watermarks.
- 🎯 Cross-platform: Available for Windows, macOS, and Linux, making it a versatile choice for different operating systems.
- ⚠️ Customizable interface: Shotcut allows you to rearrange panels and tools to suit your workflow.
Limitations: Shotcut has a steeper learning curve than beginner-friendly apps like iMovie or CapCut. Its interface may feel cluttered to new users.
🔹 Blender
Best for: Users interested in 3D animation, modeling, and VFX alongside video editing.
Key Features:
- ✅ All-in-one tool: Blender includes video editing, 3D modeling, animation, and compositing in a single software.
- 🎯 Advanced VFX: Blender’s powerful compositing tools allow for professional-grade visual effects.
- ⚠️ Complex interface: Blender’s interface is designed for 3D work, which can be overwhelming for beginners focused solely on video editing.
Limitations: Blender is resource-intensive, requiring a powerful computer for smooth operation. It’s also more suited for complex projects than simple edits.
🔹 Lightworks
Best for: Professionals and filmmakers who need a robust editor with industry-standard tools.
Key Features:
- ✅ Industry-standard: Lightworks has been used in the editing of films like The Wolf of Wall Street and The King’s Speech.
- 🎯 Advanced features: Includes multi-cam editing, real-time effects, and hardware acceleration.
- ⚠️ Free and paid versions: The free version includes most features, but the paid Pro version unlocks additional tools and export options.
Limitations: Lightworks has a complex interface that may intimidate beginners. The free version also exports videos with a watermark.
🔹 Kdenlive
Best for: Linux users or those looking for a free, open-source alternative to Premiere Pro.
Key Features:
- ✅ Open-source and free: Kdenlive is completely free with no ads or watermarks.
- 🎯 Multi-track editing: Supports unlimited video and audio tracks for complex projects.
- ⚠️ Linux-focused: Primarily designed for Linux, though Windows and macOS versions are available.
Limitations: Kdenlive can be buggy on non-Linux platforms. It also lacks some advanced features found in professional software.
🏁 Final Verdict: Is Video Editing Worth Your Time?
Video editing is no longer a skill reserved for professionals or filmmakers. With the rise of social media, online content creation, and accessible editing tools, anyone can learn to edit videos like a pro. Whether you’re a content creator, marketer, educator, or hobbyist, mastering video editing opens doors to new opportunities and creative expression. The ability to transform raw footage into polished, engaging content is invaluable in today’s digital landscape.
Investing time in learning video editing pays off in multiple ways. For content creators, it enhances the quality of your videos, making them more appealing to audiences and increasing engagement. For businesses, video content is a powerful marketing tool that can drive traffic, boost conversions, and improve brand awareness. Even for personal projects, such as documenting events or creating family memories, editing allows you to tell your story in a more compelling way.
However, video editing isn’t without its challenges. The learning curve can be steep, especially for advanced techniques like color grading or motion tracking. Additionally, high-quality editing requires patience and attention to detail. If you’re not prepared to invest time in learning and refining your skills, the results may not meet your expectations. That said, the rewards of mastering video editing far outweigh the challenges. With the right tools, resources, and mindset, you can create professional-quality videos that captivate and inspire.
❓ Frequently Asked Questions
- What are the best video editing apps for beginners?
For beginners, user-friendly apps like CapCut, iMovie, and Canva are excellent choices. These apps offer intuitive interfaces, basic editing tools, and plenty of tutorials to help you get started. They’re perfect for social media content, short videos, and simple projects.
- Do I need a powerful computer for video editing?
It depends on the type of editing you’re doing. For basic edits in 1080p, a mid-range computer with 8GB of RAM and a dedicated graphics card should suffice. However, for 4K editing or advanced effects, you’ll need a more powerful setup with 16GB of RAM or more, a fast processor, and a high-end graphics card.
- Can I edit videos on my phone?
Yes! Many mobile apps, such as CapCut, LumaFusion, and iMovie, offer robust editing tools designed specifically for smartphones. These apps allow you to edit videos on the go, making them ideal for social media content and quick projects.
- What’s the difference between video editing and video production?
Video editing is the process of manipulating and arranging video shots to create a cohesive narrative. Video production, on the other hand, encompasses the entire process of creating a video, including pre-production (planning, scripting), filming, and post-production (editing, sound design). Editing is just one part of the production process.
- How can I make my videos look more professional?
To make your videos look professional, focus on storytelling, pacing, and visual quality. Use advanced editing techniques like color grading, motion tracking, and keyframing to enhance your footage. Pay attention to audio quality, as poor audio can ruin an otherwise great video. Additionally, use high-resolution footage and smooth transitions to create a polished final product.
- What are the best free resources for learning video editing?
There are plenty of free resources available for learning video editing. YouTube channels like Film Riot, Premiere Gal, and Justin Odisho offer tutorials for various editing software. Websites like Envato Tuts+ and Skillshare (free trial available) also provide in-depth courses. Additionally, many editing apps include built-in tutorials and help guides.
- Is it legal to use copyrighted music in my videos?
No, using copyrighted music without permission can lead to copyright strikes, takedowns, or legal action. To avoid these issues, use royalty-free music from platforms like Epidemic Sound, Artlist, or YouTube’s Audio Library. Always check the licensing terms to ensure you’re using the music legally.
- How do I choose the right video format for export?
The right export format depends on where you’re sharing your video. For social media, MP4 is the most widely supported format with H.264 codec. For high-quality playback on computers, consider using ProRes or DNxHD. Always check the platform’s recommended settings for optimal results.
- What are the most common video editing mistakes to avoid?
Common mistakes include overusing transitions, ignoring audio quality, neglecting color correction, and not organizing your project files. Other pitfalls include rushing edits without proper pacing, using too many effects, and not backing up your work. Take your time to plan your edits and review your footage carefully.
- Can I make money from video editing?
Yes! Video editing is a valuable skill that can open doors to freelance work, full-time jobs, and content creation opportunities. You can offer editing services on platforms like Fiverr, Upwork, or Freelancer. Content creators on YouTube, TikTok, and other platforms often hire editors to enhance their videos. Additionally, you can create and sell templates, presets, or tutorials for editing software.