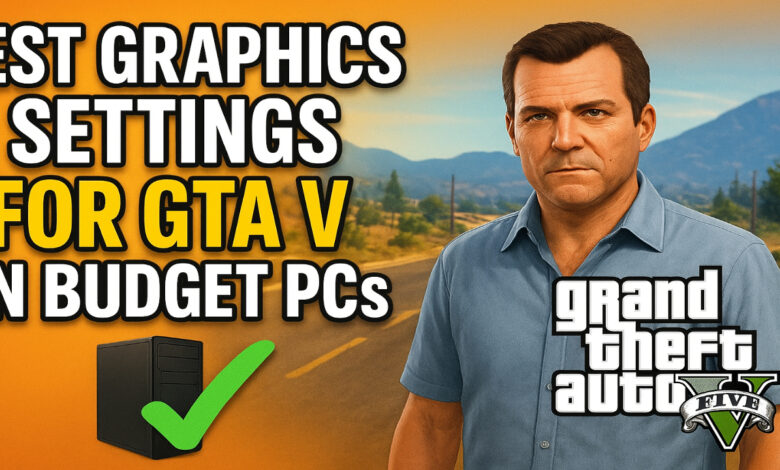
🎮 Grand Theft Auto V: Optimizing Graphics for Budget PCs 🚀
Grand Theft Auto V, even years after its initial release, remains a titan in the gaming world. Its sprawling open world, engaging story, and endless replayability make it a must-have for many gamers. However, its graphically demanding nature can be a significant hurdle for those rocking more modest or “budget” PC setups. Fear not, fellow gamers! This comprehensive guide will walk you through the best graphics settings to tweak, allowing you to enjoy the chaotic beauty of Los Santos without turning your PC into a stuttering mess. We’ll delve deep into each setting, explaining its impact and offering recommendations to strike that perfect balance between visual fidelity and smooth performance.
📉 Understanding the Performance-Visuals Trade-off 📊
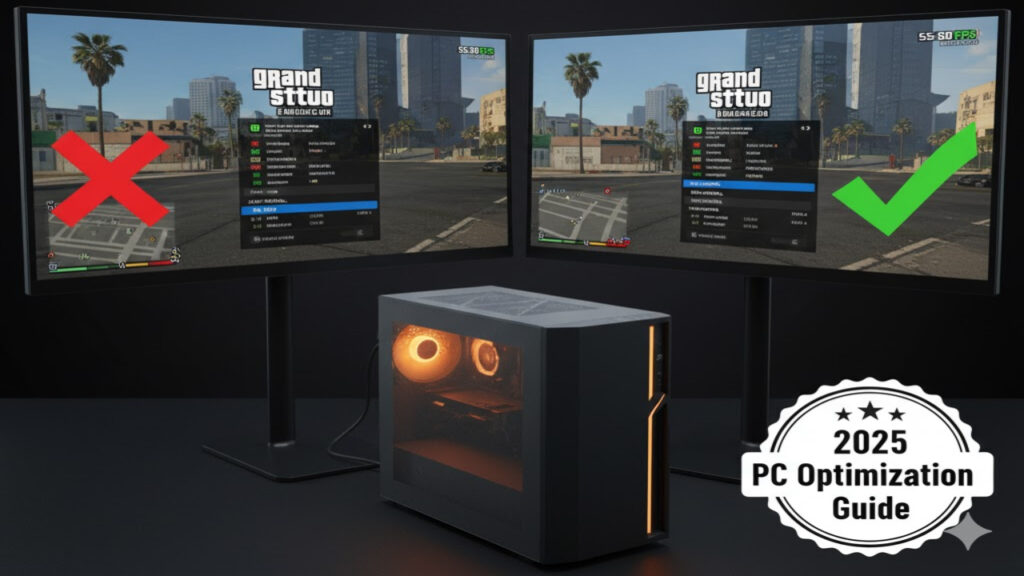
Before we dive into the nitty-gritty, it’s crucial to understand the fundamental principle behind graphics optimization: it’s a trade-off. Every setting you enable or increase pushes your hardware harder, resulting in better visuals but potentially lower frame rates. Conversely, lowering settings frees up resources, boosting performance but at the cost of graphical detail. Our goal here is to find the “sweet spot” where you get acceptable visuals and a consistently playable frame rate on your budget PC. Remember, a steady 30 frames per second (FPS) is generally considered playable for single-player games, while 60 FPS offers a much smoother experience.
⚙️ Essential Initial Steps: Drivers and Background Apps 🛠️
Before even touching GTA V’s in-game settings, ensure your system is optimized externally:
- Update Your Graphics Drivers: This is paramount! NVIDIA, AMD, and Intel frequently release driver updates that include performance optimizations for popular games like GTA V. Always download the latest stable drivers directly from the manufacturer’s website.
- Close Background Applications: Every program running in the background consumes precious CPU and RAM resources. Close web browsers, chat applications, streaming services, and anything else you don’t absolutely need while gaming.
- Disable Game Bar/Overlays: While convenient, overlays from platforms like Xbox Game Bar, Discord, or GeForce Experience can sometimes impact performance. Try disabling them if you’re experiencing stutters.
- Set Power Plan to High Performance: In Windows Power Options, ensure your power plan is set to “High Performance” to allow your CPU and GPU to operate at their full potential.
🖥️ Display Settings: Your Foundation for Performance 🖼️
These are the first settings you’ll encounter and they have a significant impact:
- Resolution: 🎯 This is arguably the most impactful setting. Running the game at your monitor’s native resolution (e.g., 1920×1080) is ideal for visual clarity, but if your budget GPU struggles, consider dropping it.
- Recommendation: Start at your native resolution. If performance is poor, try dropping to 1600×900 or even 1280×720. The image will appear softer, but your FPS will thank you.
- Aspect Ratio: 📏 Keep this at your monitor’s native aspect ratio (usually 16:9 for most displays) to avoid stretching or distorting the image.
- Refresh Rate: ⚡ Match this to your monitor’s refresh rate (e.g., 60Hz, 75Hz).
- Output Monitor: 💻 Select your primary display if you have multiple monitors.
🎨 Graphics Settings: The Main Event for Optimization 🚀
Now, let’s dive into the core graphics settings, where most of your performance gains will be found.
🌟 Texture Quality: Visual Detail vs. VRAM 💾
Texture Quality dictates the sharpness and detail of surfaces in the game world. It primarily impacts your GPU’s Video RAM (VRAM).
- Impact: High textures look great but can quickly max out VRAM on budget GPUs (e.g., those with 2GB or less). Exceeding VRAM capacity leads to stuttering as the system tries to swap textures in and out of slower system RAM.
- Recommendation:
- Normal: For GPUs with 2GB VRAM or less. This offers a good balance.
- High: For GPUs with 3GB-4GB VRAM.
- Very High: Only for GPUs with 6GB+ VRAM.
👁️ Shader Quality: Lighting and Effects Complexity ✨
Shader Quality affects the complexity of lighting, shadows, and various visual effects.
- Impact: Moderate impact on GPU, slight impact on CPU. Higher settings make lighting and materials look more realistic.
- Recommendation:
- Normal: For most budget systems.
- High: If you have a decent budget GPU and want a small visual bump.
🔍 Shadow Quality: Performance Killer! 👻
Shadows are notoriously performance-intensive in almost any game, and GTA V is no exception.
- Impact: High impact on GPU, especially in busy areas with many light sources.
- Recommendation:
- Normal: Your best bet for budget PCs. The shadows will be less defined but still present.
- Softest: Even “Normal” shadows can be a drain. If you’re desperate for frames, setting it to “Softest” will blur them slightly, reducing the performance hit. Avoid “High” or “Very High” unless you have significant headroom.
💧 Reflection Quality: Mirror, Mirror on the Wall… of Performance 🚗
This setting governs the detail and accuracy of reflections on shiny surfaces (cars, puddles, windows).
- Impact: Significant GPU impact, especially during rain or in areas with many reflective surfaces.
- Recommendation:
- Normal: Absolutely crucial for budget PCs. Anything higher will severely hit your FPS.
- Off/Low: If you’re still struggling, consider turning this down even further or off, although it will make vehicles and wet roads look less realistic.
🌊 Water Quality: Liquid Performance Drain 🚤
Water Quality affects the visual fidelity of oceans, rivers, and puddles.
- Impact: Moderate GPU impact, particularly noticeable near large bodies of water.
- Recommendation:
- Normal: Stick to this. The difference between Normal and High isn’t worth the performance cost on a budget system.
🌿 Particle Quality: Explosions and Smoke 💥
This setting controls the detail of effects like smoke, fire, and debris.
- Impact: Moderate GPU impact during intense action sequences.
- Recommendation:
- Normal: Perfectly acceptable for budget systems. You’ll still see explosions and smoke, just with less intricate detail.
☁️ Grass Quality: Lush Landscapes or Laggy Swamps? 🌾
Grass Quality dictates the density and rendering distance of foliage. Another major performance killer!

- Impact: Extremely high GPU and CPU impact. Dense grass can decimate frame rates.
- Recommendation:
- Normal: This is almost mandatory for budget PCs. You’ll still have grass, but it won’t be as lush or render as far, which is a necessary compromise.
- Off/Low: If even Normal is too much, turning it off or to the lowest setting will give you a significant FPS boost, though the world will look much barer.
🌫️ Soft Shadows: The Softer, The Slower 🐌
This setting enhances shadow realism by blurring their edges.
- Impact: High GPU impact.
- Recommendation:
- Sharper: This is the most performance-friendly option. It might look less realistic, but it’s vital for maintaining frame rates. Never use “Soft” or “Softer” on a budget system.
🏞️ Post FX: A Touch of Polish (That Costs Performance) ✨
Post FX refers to various post-processing effects like bloom, depth of field, and color grading.
- Impact: Moderate GPU impact.
- Recommendation:
- Normal: A good starting point. You might even try “High” if you have a bit of headroom, but monitor your FPS. Avoid “Ultra” for budget systems.
↔️ Anisotropic Filtering: Texture Clarity at Angles 📏
Anisotropic Filtering (AF) improves the clarity of textures when viewed at an angle, like roads stretching into the distance.
- Impact: Relatively low GPU impact compared to other settings, especially at lower levels.
- Recommendation:
- 8x: Often a good compromise. You can try 16x if your GPU handles it without a hitch, as the visual improvement is noticeable for a minor performance cost. Avoid anything lower than 4x if possible.
🏃♂️ Ambient Occlusion: Realistic Shading in Corners 🌑
Ambient Occlusion (AO) adds realistic shading to areas where surfaces meet or objects are close, creating a sense of depth.
- Impact: Moderate to high GPU impact.
- Recommendation:
- Off: For maximum performance.
- Normal: If you have some overhead and want a bit more visual depth. This is usually the best setting if you can run it.
⚙️ Tessellation: Smoother Surfaces 🔺
Tessellation adds more geometric detail to surfaces like terrain, making them appear smoother and less blocky.
- Impact: Moderate GPU impact.
- Recommendation:
- Off: For budget systems, this is generally the best choice. The visual difference isn’t always glaring, but the performance gain is welcome.
📏 Advanced Graphics Settings: Further Tweaks for Power Users 📈
These settings are often hidden away but offer further control.
- Long Shadows: 🏙️ Adds longer, more realistic shadows during certain times of day.
- Recommendation: Off. This is a purely aesthetic option with a performance cost.
- High Resolution Shadows: 🖼️ Makes shadows look sharper.
- Recommendation: Off. Again, higher detail means more performance impact.
- High Detail Streaming While Flying: ✈️ Loads higher detail textures when you’re high above Los Santos.
- Recommendation: Off. Only useful if you spend a lot of time flying and have VRAM to spare.
- Extended Distance Scaling: 🌌 Controls how far detailed objects are rendered. This is a massive CPU and GPU killer.
- Recommendation: Push this slider as far left as possible. A low setting here is crucial for budget systems.
- Extended Shadow Distance: 🌑 How far shadows are rendered.
- Recommendation: Push this slider as far left as possible. Similar to Extended Distance Scaling, it’s a performance hog.
- Frame Scaling Mode: 📊 Renders the game at a higher or lower internal resolution and scales it to your display.
- Recommendation: Keep this Off. If your native resolution is too demanding, it’s better to drop the actual resolution in the Display settings rather than use this, as it can introduce blurriness.
Anti-Aliasing: Smoothing Jagged Edges (at a Cost) 🚫📐
Anti-aliasing techniques smooth out the “jaggies” (stair-step patterns) on diagonal lines.
- FXAA (Fast Approximate Anti-Aliasing): The least demanding method, but can introduce a slight blur.
- Recommendation: On. This is your best bet for budget systems as it smooths edges without a massive performance hit.
- MSAA (Multi-Sample Anti-Aliasing): Much more graphically intensive but provides a cleaner image.
- Recommendation: Off. Avoid MSAA entirely on budget systems. Even 2x MSAA can significantly reduce frame rates.
- NVIDIA TXAA / AMD FidelityFX CAS: If you have an NVIDIA or AMD card, these options might be available. TXAA is very demanding. FidelityFX CAS is a sharpening filter that can sometimes be used in conjunction with a lower resolution to improve clarity.
- Recommendation: Generally Off for budget systems, stick to FXAA if you need anti-aliasing.
💡 General Recommended Settings for Budget PCs (Summary) 📝
To make things easier, here’s a quick rundown of recommended starting points. Remember to experiment!
- Resolution: 1280×720 or 1600×900 (if 1080p is too much)
- FXAA: On
- MSAA: Off
- NVIDIA TXAA: Off
- VSync: On (to prevent screen tearing, but if performance is really low, try Off)
- Pause Game On Focus Loss: Your preference
- Population Density: 📉 25-50% (lower for CPU-bound systems)
- Population Variety: 📉 25-50%
- Distance Scaling: 📉 As low as possible (leftmost)
- Texture Quality: Normal (2GB VRAM), High (3-4GB VRAM)
- Shader Quality: Normal
- Shadow Quality: Normal (Softest)
- Reflection Quality: Normal
- Reflection MSAA: Off
- Water Quality: Normal
- Particle Quality: Normal
- Grass Quality: Normal (or Off if desperate)
- Soft Shadows: Sharper
- Post FX: Normal
- Motion Blur Strength: Your preference (set to 0 for no blur)
- In-Game Depth Of Field Effects: Off
- Anisotropic Filtering: 8x
- Ambient Occlusion: Off (or Normal if possible)
- Tessellation: Off
- Long Shadows: Off
- High Resolution Shadows: Off
- High Detail Streaming While Flying: Off
- Extended Distance Scaling: As low as possible (leftmost)
- Extended Shadow Distance: As low as possible (leftmost)
- Frame Scaling Mode: Off
🧪 The Art of Experimentation: Finding Your Sweet Spot 🎯
Optimizing GTA V on a budget PC is less about a one-size-fits-all solution and more about experimentation. Every budget PC configuration is slightly different, and what works perfectly for one might not work for another.
Here’s a recommended approach:
- Start with the “Recommended Settings” above.
- Launch GTA V and find a demanding area. Drive around the city, especially during the day, or initiate a chaotic firefight. Use an FPS counter (like MSI Afterburner or the in-game counter if available) to monitor your frame rate.
- Tweak one setting at a time. If you’re consistently below your target FPS (e.g., 30 FPS), lower the most impactful settings first (Shadow Quality, Grass Quality, Extended Distance Scaling, Reflection Quality).
- Test, test, test! Make a change, restart the game (if required, or apply changes), and re-test in the same demanding area.
- Gradually increase settings if you have performance headroom. Once you hit your target FPS, you can slowly try bumping up less impactful settings like Texture Quality (if VRAM allows), Anisotropic Filtering, or Post FX to see if you can squeeze out a little more visual fidelity without sacrificing smoothness.
🚀 Beyond In-Game Settings: Further Optimizations 🛠️
If you’ve exhausted all in-game settings and still crave more performance, consider these advanced steps:
- Game Mode (Windows 10/11): Ensure Windows Game Mode is enabled. It prioritizes gaming performance by suspending background processes.
- NVIDIA/AMD Control Panel Settings:
- Texture Filtering Quality: Set to “High Performance.”
- Power Management Mode: Set to “Prefer Maximum Performance.”
- Shader Cache: Enable.
- Clean Your PC: Dust accumulation can lead to overheating, which throttles performance. Regularly clean your PC’s fans and heatsinks.
- Overclocking (Advanced Users Only): If you’re comfortable and knowledgeable, a mild overclock of your GPU or CPU can provide a small performance boost. Proceed with caution and at your own risk.
- SSD Installation: If GTA V is installed on a traditional Hard Disk Drive (HDD), moving it to a Solid State Drive (SSD) won’t directly boost FPS, but it will drastically improve loading times and reduce texture pop-in.
🎉 Conclusion: Enjoying Los Santos on Any Rig! 🌆
Grand Theft Auto V is a masterpiece that everyone deserves to experience. While budget PCs might require a bit more TLC when it comes to settings, with the right optimizations, you can absolutely enjoy a smooth and visually pleasing journey through Los Santos. Remember, the key is balance and patience. Experiment with these settings, find what works best for your specific hardware, and get ready to embark on countless hours of mayhem and adventure! Happy gaming! 🚗💨